Install and activate the add-on first.
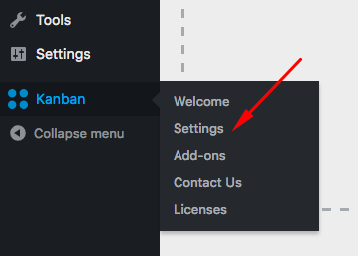
Sign into your WordPress admin and go to Kanban > Settings.
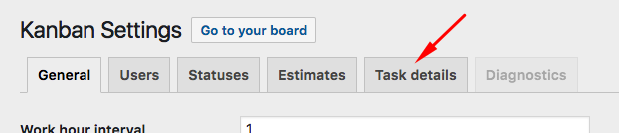
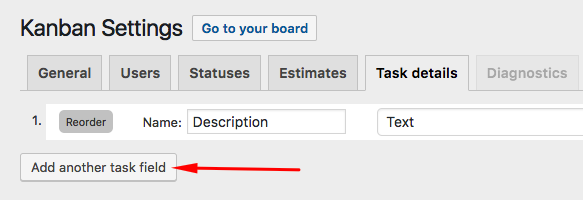
Click the Task Details tab.
If you’re installing the add-on for the first time, we’ve included a first sample field called “Description”.
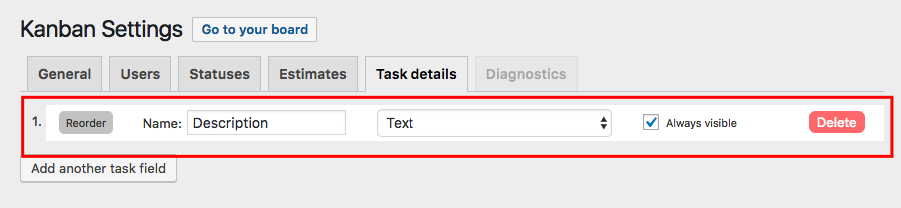
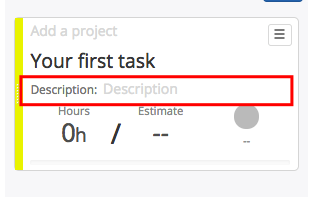
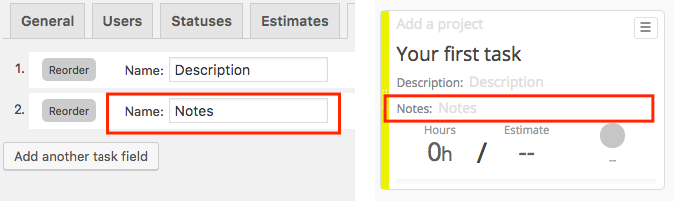
This is an example of a simple text field type. It will look like this on your board.
To add another field, click the “Add another task field” button.
Give the field a name. This is displayed as the label on your board.
Choose what kind of field you want. Different field types display differently on your Kanban board.
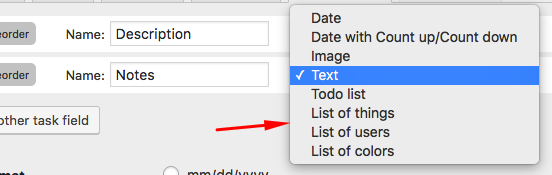
You can read more about the different field types here.
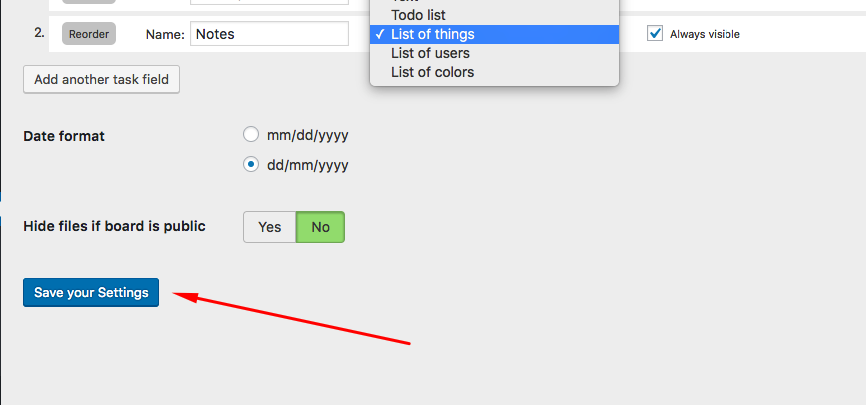
The “always visual” checkbox decides if the field should be hidden until the extra fields are expanded.

Fields are expanded on the Kanban board by clicking the down arrow under the task menu icon.

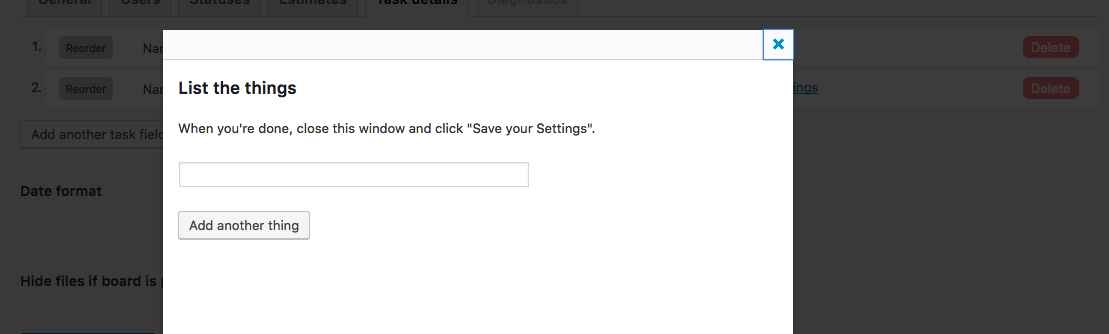
Some fields have extra settings, like List of Things and List of Colors. These settings become available only after you save your fields. Add these fields and click the “Save your settings” button.
Now you will see a “Settings” link next to your field.

Click this link to see the extra options in a modal window.
To reorder your fields, click and drag them using the “Reorder” button.

To delete a field, click the “Delete” button.
