Here you will learn how to add a Date Field to a Card and how to update the Date Field.
Related: Learn how you can add and update Text Fields.
1. Open the Board you wish to edit Cards for
You can see the list of your Boards in the top left corner of your screen. Access the necessary Board by simply clicking on it.
![]()
2. Click the gear icon in the footer
Open the Board settings menu by clicking the ![]() icon at the bottom of the page.
icon at the bottom of the page.

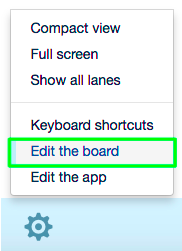
3. In the context menu, select “Edit the board”
Alternatively, you can click Shift + B on your keyboard.
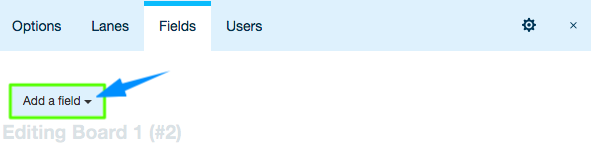
4. In the window that will open, go to the “Fields” tab

5. Click “Add a field”
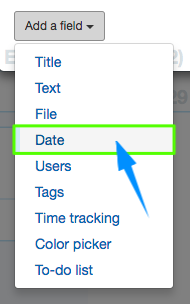
6. From the dropdown, select “Date”
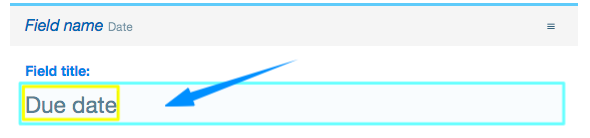
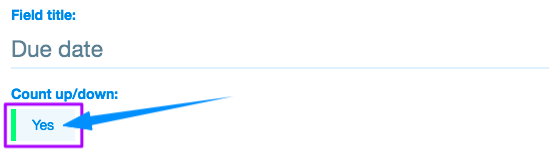
7. In the “Field Title” input field, enter the title for the Date Field
For example, if this Date Field will show when the task is expected to be completed, you can name it “Due date”.
8. Switch between “Yes”/”No” in order to activate/deactivate “Count up/down” respectively
If you activate “Count up/down” (i.e., if you switch to “Yes”), in the Card there’ll be shown how many days remain until due date.
9. Switch between “Yes”/”No” in order to hide/show the Date Field in the Cards respectively
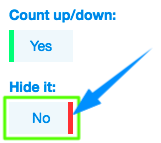
Note: If you select to hide the Date Field (i.e., if you switch to “Yes”), it will appear in the Card as a collapsible section.

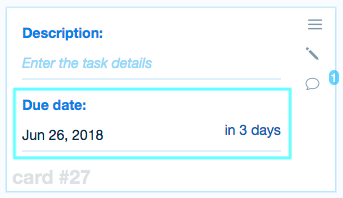
Done! You have added a Date Field to the Cards in this Board. Here is a sample image of how the Date Field will look for the user.
Related: Learn how you can add and update Title Fields.